What is Rough In Plumbing?
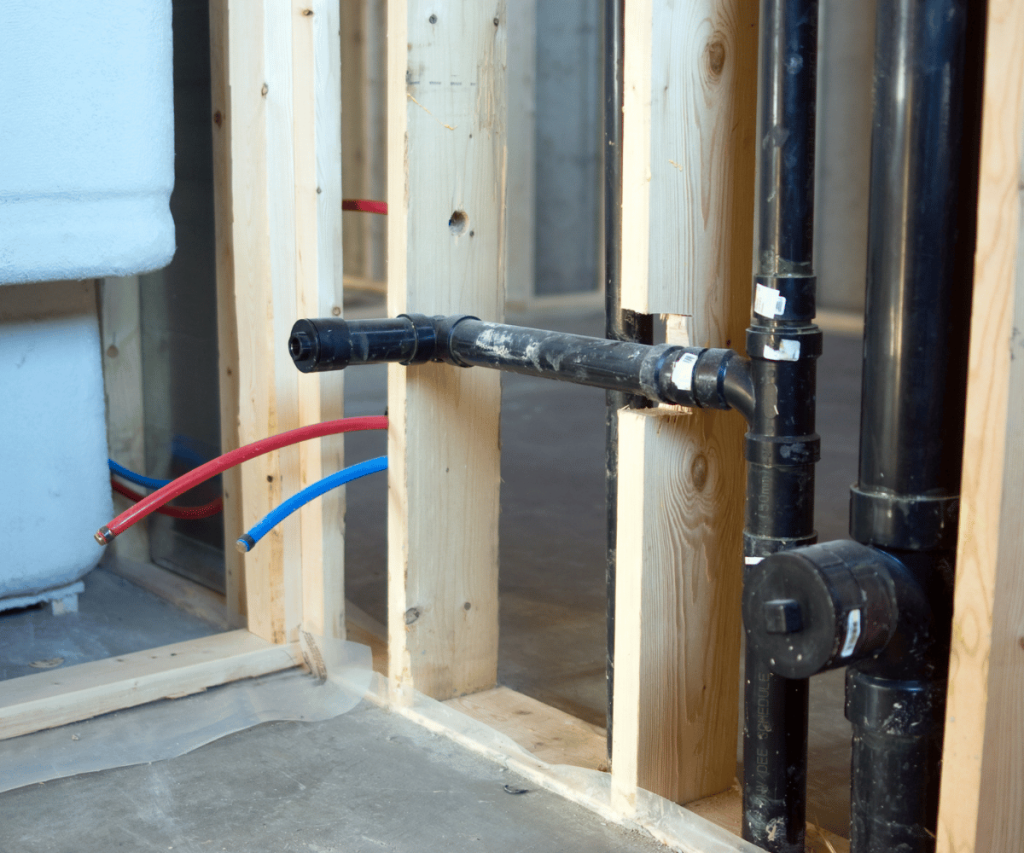
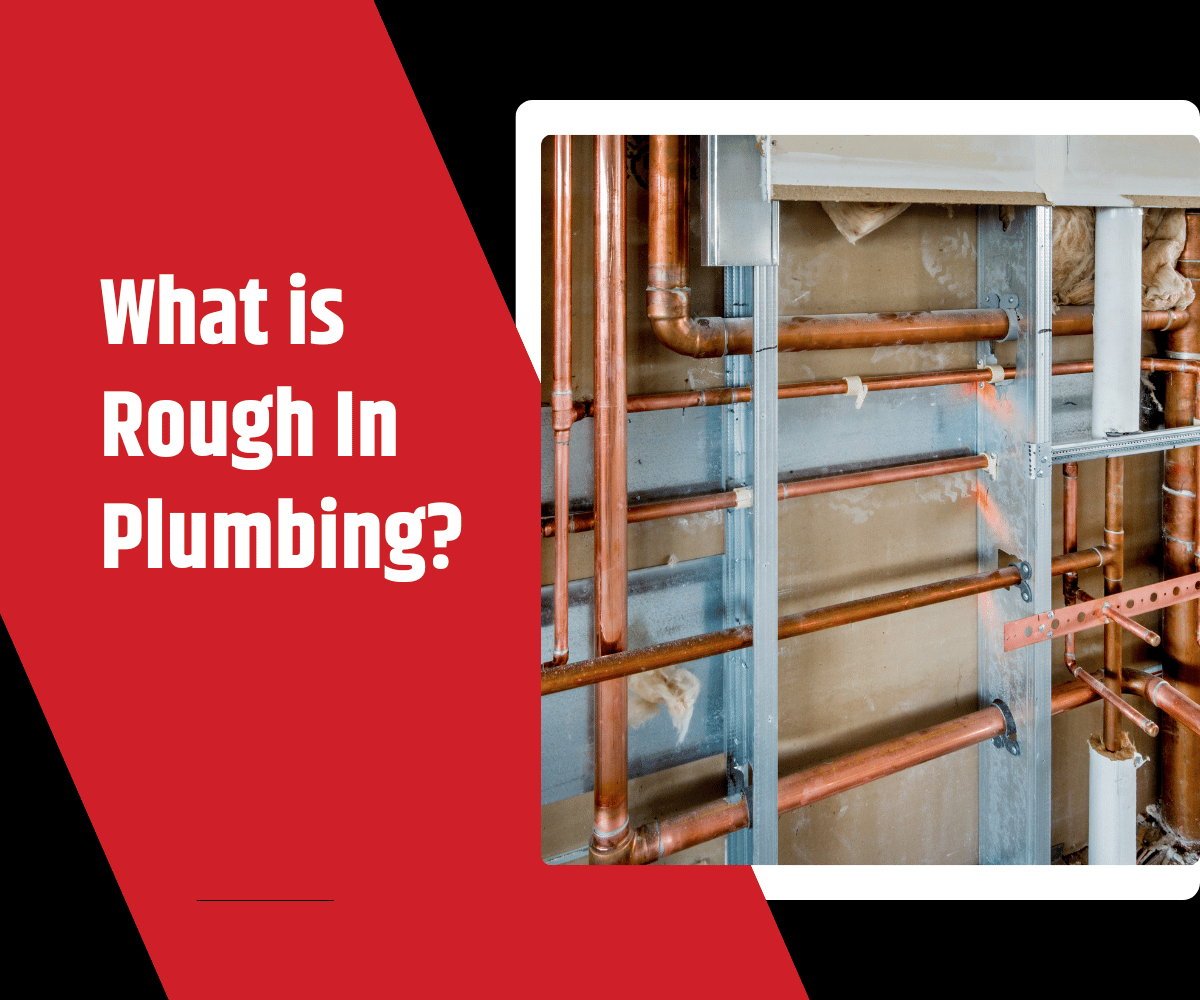
In any new construction or major renovation project, rough-in plumbing is an essential phase. It involves installing the basic plumbing framework, including pipes for water supply, drain lines, and venting systems, but it stops short of installing fixtures. rough in plumbing prepares a building’s infrastructure, allowing for future installation of sinks, showers, toilets, and other plumbing fixtures. This step is crucial for a functional and long-lasting plumbing system, as it ensures everything is in the right place before walls are enclosed and final finishes are applied.
Rough In vs. Finish Plumbing
In construction, plumbing is completed in two main phases: rough in and finish. Rough-in plumbing focuses on the skeleton of the plumbing system, including routing pipes, installing vents, and connecting the system to water and waste lines. Finish plumbing, on the other hand, occurs once walls are closed up. During this phase, plumbers install fixtures like faucets, toilets, and water heaters. Rough-in is all about laying the groundwork; finish plumbing makes the system usable.
Key Components of Rough-In Plumbing
1. Water Supply Lines
Water supply lines are pipes that carry fresh water to fixtures and appliances. During the rough in stage, these lines are installed but not yet connected to faucets or fixtures. These supply lines are carefully routed and placed to ensure they reach the necessary areas while staying within walls or floor cavities.
2. Drain Lines and Venting Systems
Drain lines transport wastewater out of the building, while vent stacks help manage airflow in the drainage system, preventing water from getting trapped in pipes. Proper installation of these lines is essential for maintaining an efficient and odor-free plumbing system. Venting also helps keep consistent air pressure, ensuring that wastewater flows smoothly out of the building.
3. Utility Connections
At this stage, connections to external utilities, like the water main and sewer lines, are made. These connections allow the plumbing system to function properly and link the building’s system to municipal services. Accurate placement and secure installation here are critical to prevent leaks and ensure future access for maintenance.
Pre Rough In Preparations
1. Planning and Design
Before starting rough in plumbing, a detailed plan is created. This plan maps out where each fixture will go and ensures that the layout complies with local codes. Proper planning also reduces the risk of rework, saving time and costs in the construction process.
2. Working with the Framing
Framing should be complete before plumbers start roughing in pipes. The framing provides the structure that supports the plumbing, so installing pipes too early could lead to conflicts with framing changes. Plumbing runs through wall studs, joists, and other structural components, and plumbers must follow the framing layout to install the pipes correctly.
3. Site Inspection
Conducting a walkthrough with the building contractor is a crucial step in confirming fixture placements and ensuring nothing has been overlooked for water safety. This inspection helps prevent layout issues and confirms the rough-in plan is compatible with the entire construction blueprint.
Step-by-Step Rough-In Plumbing Process
1. Excavation and Underground Piping
The process begins with excavation, where underground water and drain lines are laid from the utility connections to the main structure. This step establishes the foundation of the plumbing system.
2. Drilling and Routing Pipes
Once the main lines are in place, pipes are routed through wall cavities and other spaces. This step ensures that water and waste lines reach their intended locations while remaining concealed within walls and floors.
3. Setting Up Drainage Slopes
Proper drainage relies on gravity, so pipes are angled to allow waste to flow naturally. This slope needs to be calculated carefully to prevent blockages and ensure that wastewater moves efficiently through the system.
4. Venting Systems Installation
Vents are routed through walls and up to the roof, providing necessary airflow for the drainage system. Venting ensures that wastewater flows smoothly and prevents sewer gases from building up in the plumbing.
5. Final Pipeline Connections
In the final stage of rough in plumbing, all pipes are securely connected to each other and to the main water supply. This final connection stage also involves pressure tests to ensure the system is leak-free and ready for inspection.

Best Practices in Rough-In Plumbing
1. Following Gravity for Drain Pipes
Drain pipes must be angled correctly to harness gravity effectively. Setting pipes at the wrong angle could lead to drainage issues, blockages, or even backflow problems.
2. Properly Positioning Vent Stacks
Vent stacks need to be positioned so they can reach the roof without any obstruction. This placement ensures proper airflow and consistent pressure in the plumbing system.
3. Avoiding Horizontal Runs
Horizontal runs for drain lines should be minimized because they can lead to blockages and improper drainage. When necessary, horizontal pipes should be kept short and positioned at an appropriate slope to maintain efficiency.
Inspection and Code Compliance
1. Inspection Requirements
A professional inspection is essential after rough-in plumbing to ensure the system meets local codes and is leak-free. Passing inspection allows construction to proceed to the finish plumbing stage with confidence.
2. Common Mistakes and How to Avoid Them
Some common mistakes during rough-in plumbing include incorrect pipe slopes, insufficient venting, and poor insulation. Working with experienced plumbers and following a well-designed plan can prevent these issues.
3. Meeting Building Codes
Every step in rough in plumbing must meet building codes, which vary by location. Codes ensure the plumbing system is safe, functional, and compliant with local regulations, preventing costly adjustments later.
Transitioning from Rough In to Finish Plumbing
1. Preparing for the Finish Phase
Before moving to finish plumbing, caps are added, and fittings are checked for stability. This step ensures that pipes remain undisturbed during subsequent construction work.
2. Final Adjustments Before Wall Closure
Before closing up walls, plumbers perform final checks, including testing for leaks, checking valve placements, and securing pipes. This step guarantees that the system is ready for finish plumbing and final fixture installations.
Choose Bowers Plumbing & Remodel for Rough In Plumbing in New Construction
Experience and Expertise
With years of experience, Bowers Plumbing & Remodel is a trusted choice for rough-in plumbing services. Our knowledgeable team understands the intricacies of rough-in work and ensures each job meets the highest standards of safety and efficiency.
Commitment to Quality
We pride ourselves on our attention to detail and quality assurance practices. From precise installations to thorough inspections, we guarantee that every part of our work stands up to rigorous standards.
Long-Term Durability
Bowers Plumbing & Remodel is committed to creating durable, reliable plumbing systems designed to last for decades. Our goal is to lay a solid foundation so that your plumbing serves your property reliably and efficiently.
Contact Bowers Plumbing & Remodel Today!
Experience the difference with Bowers Plumbing & Remodel. We offer 24-hour plumbing services, routine maintenance, and expert rough-in plumbing services that prioritize quality and customer satisfaction. With our commitment to high standards, you can trust us to ensure your plumbing system is set up to last.
Whether you’re starting a new construction project or looking to upgrade your existing plumbing, Bowers Plumbing & Remodel is here to help. We offer free plumbing consultations to discuss your plumbing needs and help you design the perfect system for your space.
Don’t wait—contact Bowers Plumbing & Remodel today to schedule your consultation and get the expert assistance you need for all your plumbing and remodeling projects!
Frequently Asked Questions
- What does plumbing rough-in include?
Plumbing rough-in includes installing water supply lines, drain lines, vent stacks, and connections to main utilities. It prepares the structure for finish plumbing by setting up the foundational plumbing system. - Why is it called rough-in?
It’s called rough-in because it involves the basic installation of pipes and connections before walls are closed up, without adding final fixtures like sinks or toilets. This “rough” phase lays the groundwork for the finish plumbing stage. - What is the difference between rough-in and top-out plumbing?
Rough-in plumbing refers to laying the primary lines and connections in the initial construction stages, while top-out is the phase where pipes are completed up to the roof, mainly for venting and water lines that extend to the upper parts of a structure. - What to do after rough-in plumbing?
After rough-in plumbing, you’ll need an inspection to ensure compliance with codes. Once approved, you can proceed to the finish plumbing phase, where fixtures and fittings are installed to make the system functional. - How much does rough-in plumbing cost?
Rough-in plumbing costs can range from $1,500 to $5,000 on average, depending on project size and location. A professional plumber can provide an accurate estimate based on your specific needs. - Can I DIY rough-in plumbing?
Rough-in plumbing is best handled by professionals as it must meet local codes and involves complex installations. Attempting a DIY job can lead to costly mistakes, and professional expertise ensures proper setup and compliance.


